How to Make a Gorgeous Pailette Bag: A Step-by-Step Guide
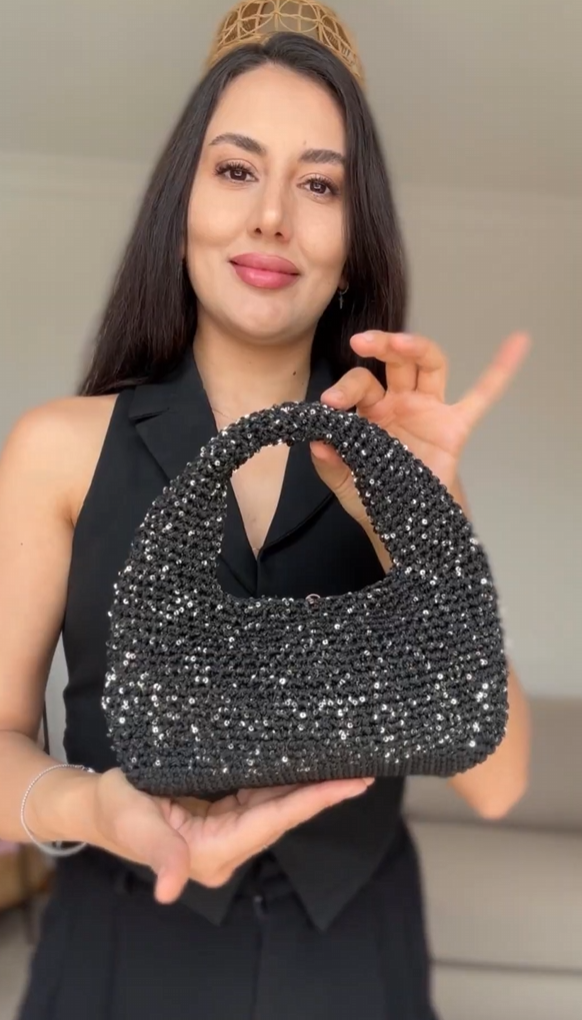
Are you ready to create a stunning, handcrafted bag that’s both stylish and unique? Today, I'm going to show you how I made a beautiful bag using Sensy's black pailette threads and 2mm polyester macrame cord. Whether you're a beginner or an experienced crafter, this step-by-step guide will walk you through the process.
Let’s dive into it!

Materials You’ll Need:
-
Sensy’s 2mm Polyester Macrame Cord – This will form the base of your bag.
-
Sensy’s Black Sequin Thread – Adds sparkle and glamour to your creation.
-
Scissors – For cutting your cords and threads to the right lengths.
-
Bag Handles (optional) – You can either buy pre-made handles or make your own.
-
Measuring Tape/Marker – For marking the spots where you’ll place your handles.
Step 1: Create the Base of Your Bag
To start, you’ll want to create a strong and sturdy base for your bag. I’ve chosen Sensy’s 2mm polyester macrame cord because it’s perfect for this. The thick, durable material gives the bag structure while still being flexible enough for intricate design work.

-
Begin by cutting the macrame cord to your desired length. This will depend on how large or small you want the base of the bag to be.
-
Start working in rows or spirals to create a solid foundation for the bag’s body. Make sure each row is tightly knotted to ensure the base is strong.
Step 2: Add the Sequin Thread for Glamour
Once you’ve created the base, it’s time to add a bit of sparkle! The Sensy black sequin thread is perfect for this. It adds a beautiful shine to your bag and makes it stand out.


-
Begin incorporating the sequin thread into your design. You can do this by threading it into the macrame cord in between each knot.
-
Feel free to play around with different patterns and placements of the sequin thread. This is your chance to get creative and add your personal touch!
Step 3: Mark the Spots for Your Handles
Before moving forward, you’ll need to decide where the handles will go. Mark the spots where you’d like the handles to be placed on the base of the bag. Be sure to leave enough space between them so that the bag doesn’t become too tight once the handles are attached.

-
I recommend using a fabric marker or a simple chalk pencil to mark these spots clearly.
Step 4: Work the Handles in Circles
Now comes the fun part – making the handles! Depending on the type of handle you’ve chosen (pre-made or homemade), you can either attach them directly or create your own using the same technique you used for the base of the bag.

-
If you’re making your own handles, you can continue to work with the macrame cord. Form circles or loops to create the handles, making sure they’re sturdy enough to hold the weight of the bag once it’s finished.
-
Attach the handles to the marked spots on your bag using strong knots or glue (depending on the material of your handles).
Step 5: Final Touches
Once you’ve attached your handles, give the bag a final once-over. Check the knots, adjust the sequin thread if necessary, and make sure everything is securely fastened.


-
If you’re using additional embellishments, such as charms or beads, now is the time to add them!
-
Trim any excess cord and sequin thread to tidy up the edges, and you’re done!
Conclusion
And there you have it – a gorgeous handmade bag using Sensy’s black sequin threads and 2mm polyester macrame cord. This project is not only fun but also customizable. You can make it as big, small, sparkly, or minimalistic as you want!


Whether you’re making this for yourself or as a gift, I hope this guide inspires you to create something unique and beautiful. Happy crafting!
Tags:
Previous
DIY Baby Pink Raffia Bag – Step-by-Step Tutorial
Next
How to Make a Beautiful Hair Clip Using Sensy’s Black and Brown Threads